Your creator dashboard is the central hub for managing everything related to selling Minecraft builds on LanderBlock. From uploading new builds to tracking earnings and updating your profile, every tool you need is accessible from a single interface. This guide explains each section of the dashboard so you can work efficiently from day one.
Accessing Your Creator Dashboard
After logging in, navigate to your Creator Dashboard. The dashboard uses its own dedicated layout with a top bar, header, and sidebar — separate from the main Minecraft marketplace browsing experience. The top bar includes a link back to the marketplace and a Help link to the Creator Guides.

Dashboard Navigation
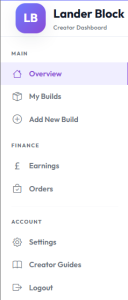
The sidebar on the left organises your dashboard into three sections:
Main
- Overview — your home screen with key stats and recent builds.
- My Builds — a full list of all your uploaded builds with status and actions.
- Add New Build — the upload form for submitting a new build.
Finance
- Earnings — your earnings summary, commission rate, and payout information.
- Orders — a log of all purchases made on your builds.
Account
- Settings — manage your profile, storefront branding, social links, and Stripe Connect.
- Creator Guides — quick link to the help and guides section.
- Logout — sign out of your account.
The header also includes a + New Build button for quick access to the upload form from any tab.
Overview Tab
The Overview tab is what you see when you first open the dashboard. It provides a snapshot of your creator activity:
- Welcome Banner — a personalised greeting showing your display name, total number of builds, and total earnings. Includes a prominent “Upload New Build” button.
- Stats Row — four stat cards displayed in a row:
- Total Earnings — the total amount you have earned from completed sales.
- Total Sales — the number of individual items sold.
- Active Builds — how many builds you currently have (published, pending, or draft).
- Your Commission % — the percentage of each sale you keep, with the platform’s share shown below.
- Recent Builds Table — a table showing your five most recent builds with their name, status (Live, Pending, or Draft), price, and an Edit action link.
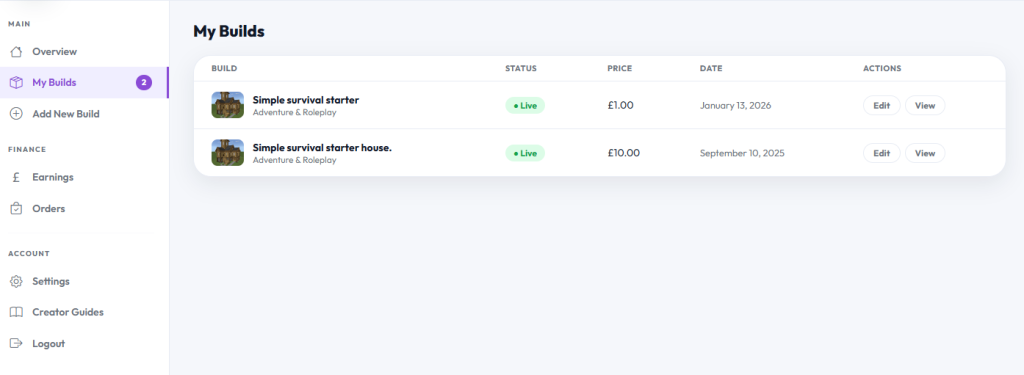
My Builds Tab
The My Builds tab shows a complete, paginated table of every build you have uploaded. Each row displays:
- Build name with thumbnail and category.
- Status — shown as a colour-coded pill: Live (green), Pending (amber), or Draft (grey).
- Price — the current listed price.
- Date — when the build was created.
- Actions — Edit button (opens the build form pre-filled) and View button (for live builds, opens the product page in a new tab).
If you have more than 10 builds, pagination links appear at the bottom. If you have no builds yet, you will see a prompt to upload your first one.
Add New Build Tab
This tab contains the full build submission form. For a detailed walkthrough of every field, see our dedicated guide: How to Upload a Build.
Earnings Tab
The Earnings tab gives you a financial overview with four stat cards:
- Total Earned — your cumulative earnings from all completed orders.
- Your Rate — the percentage of each sale that goes to you.
- Min Payout — the minimum threshold before a payout is triggered.
- Payout Method — displays “Stripe Connect” as the configured payout system.
Detailed earnings breakdowns and payout history become available once you have connected your Stripe account.
Orders Tab
The Orders tab displays a table of all purchases that include your builds. Each row shows:
- Order number
- Build name
- Buyer’s first name
- Sale total — the full price the buyer paid.
- Your earnings — your share of that sale, highlighted in green.
- Date — when the order was placed.
This tab shows completed and processing orders, so you can see sales as they come in.
Settings Tab
The Settings tab is divided into four sections:
Profile
- Display Name — the name shown on your builds and public profile. You can change this at any time.
- Email — shown but not editable here. To change your email, visit your My Account settings.
- Bio / About — a text area where you can tell buyers about yourself and your building style.
- Creator Tier — displayed as read-only. Your tier is managed by the LanderBlock admin team. If you meet the criteria for a tier upgrade, a “Request Trusted Upgrade” button appears here.
Storefront Branding
- Profile Picture — upload a square image (minimum 200×200 pixels) that represents you as a creator.
- Store Banner — upload a banner image (recommended 1400×300 pixels) that appears at the top of your public storefront.
Social Links
Add links to your social profiles so buyers can follow you outside of LanderBlock:
- YouTube
- X (Twitter)
- TikTok
- Discord
- Website
Stripe Connect
This section is entirely self-service. Click “Connect with Stripe” to link your bank account and start receiving payouts. Once connected, you can view your Stripe Express Dashboard or disconnect if needed. For full setup instructions, see Setting Up Stripe Connect.
For more detail on each setting, see Managing Your Creator Settings.
Quick Tips for Using Your Dashboard
- Check your Overview regularly to stay on top of sales and earnings.
- Use the My Builds tab to monitor which builds are live, pending review, or in draft.
- Keep your Settings up to date — a good bio, profile picture, and banner help build buyer trust.
- Connect your social links so buyers can find and follow you.
- Review your Orders to understand which builds are selling best and adjust your pricing or descriptions accordingly.